 Ubuntu Phone documentation
HTML5 Tutorials - Cordova camera app
This tutorial takes you through the steps needed to create an HTML5 app that uses the Cordova runtime and its Camera API.
The app we develop here is quite simple:
- It provides a Take Picture button.
- When Take Picture is clicked, the Cordova Camera displays.
- The user takes a picture.
- The picture is returned through Cordova and is displayed in the app’s HTML.
Before getting started
Cordova guide
You may want to read the Cordova Guide. It contains all the info you need to set up your development environment. The three prerequisites being:
- Installing
cordova-clifrom the Ubuntu Cordova PPA - Creating a click chroot for the armhf architecture, to run and contain your application
- Installing build dependencies in the click chroot; refer to the corresponding section in the Cordova Guide
HTML5 UI Toolkit basics
This tutorial is not focused on the UI Toolkit. For help, see the Ubuntu HTML5 UI Toolkit Guide.
Getting the resources for this app
You can obtain the source tree for this app as follows:
Open a terminal with Ctrl+Alt+T and get the branch with:
$ bzr branch lp:ubuntu-sdk-tutorials
Creating your Cordova app project
We will be creating the application from scratch and copy-pasting parts from the reference code.
You will need to instantiate a new project, with the following Cordova command:
$ cordova create cordovacam cordovacam.mydevid
$ cd cordovacam
Tip: You may want to add app project files to revision control such as Bazaar and commit them (except the .user file, which is typically not stored in VCS).
Define your application icon
To define the icon for you application, you should first copy the sample icon
from the ubuntu-sdk-tutorials/html5/html5-tutorial-cordova-camera directory
$ cp ../ubuntu-sdk-tutorials/html5/html5-tutorial-cordova-camera/www/icon.png ./www/img/logo.png
Then you need to add this entry into the Cordova app configuration file.
Edit the config.xml file and add the line below:
<icon src="www/img/logo.png" />
Note: this is a mandatory step, to let the application pass the package validation tests.
Add the Ubuntu platform support code to your project
As explained in the Cordova Guide, you need to add platform support code to your project, which will be compiled and integrated in the Cordova runtime shipped with your application.
Add the Cordova Ubuntu runtime files into your app project:
$ cordova platform add ubuntu
Now, your project contains some additional files, notably:
platforms/ubuntu/
Add support for the Camera API
Add the Cordova Ubuntu runtime files into your app project:
$ cordova plugin add cordova-plugin-camera
Tip: Put all of files added by the previous commands into your version control system and commit them as appropriate.
Build the app
Use the standard Cordova command line tool to prepare the app for running on your Ubuntu phone.
Generally, you don't need to build the app and then run it. The run command
will ensure the app builds and the click package sent to the phone before
starting the application directly.
$ cordova run --device --debug

Tip: you may see warning messages after the build. For example: you haven't specified an icon for your application yet.
As the application is started on the device, you should also notice that the output contains debug messages to let you connect to the running Javascript code and inspect the HTML5 UI.
At this point, the app GUI is still in its default unmodified state. We implement our app GUI in the next section.
Define the HTML5 GUI
Here we replace the GUI declared in the default app with one appropriate for this Camera app.
- In index.html, add the following stylesheet declarations in the section of the document:
<meta name="viewport" content="width=device-width, initial-scale=1, maximum-scale=1, user-scalable=0"> <!-- Ubuntu UI Style imports - Ambiance theme --> <link href="/usr/share/ubuntu-html5-ui-toolkit/0.1/ambiance/css/appTemplate.css" rel="stylesheet" type="text/css" /> <!-- Ubuntu UI javascript imports - Ambiance theme --> <script src="/usr/share/ubuntu-html5-ui-toolkit/0.1/ambiance/js/fast-buttons.js"></script> <script src="/usr/share/ubuntu-html5-ui-toolkit/0.1/ambiance/js/core.js"></script> <script src="/usr/share/ubuntu-html5-ui-toolkit/0.1/ambiance/js/buttons.js"></script> <script src="/usr/share/ubuntu-html5-ui-toolkit/0.1/ambiance/js/dialogs.js"></script> <script src="/usr/share/ubuntu-html5-ui-toolkit/0.1/ambiance/js/page.js"></script> <script src="/usr/share/ubuntu-html5-ui-toolkit/0.1/ambiance/js/pagestacks.js"></script> <script src="/usr/share/ubuntu-html5-ui-toolkit/0.1/ambiance/js/tabs.js"></script>
- Ensure, you call the following 2 Javascript files in the section as well:
<!-- Cordova platform API access - Uncomment this to have access to the Javascript APIs --> <script src="cordova.js"></script> <!-- Application script and css --> <script src="js/app.js"></script
- Then, delete the entire div inside the … element and add the following new HTML fragment:
<div data-role="mainview"> <header data-role="header"> <ul data-role="tabs"> <li data-role="tabitem" data-page="camera">Camera</li> </ul> </header> <div data-role="content"> <div data-role="tab" id="camera"> <div id="loading"> <header>Loading...</header> <progress class="bigger">Loading...</progress> </div> <div id="loaded"> <button data-role="button" class="ubuntu" id="click">Take Picture</button> <img id="image" src="" /> </div> </div> <!-- tab: camera --> </div> <!-- content --> </div> <!-- mainview -->
This is a simple implementation of an Ubuntu HTML5 app. It declares the following:
- A mainview div (required)
- A header with a single tabitem: “Camera”
- A content div with two internal divs: loading and loaded
- loading div displays at launch time and includes a progress spinner. This is hidden when Cordova is ready by JavaScript code we look at later
- loaded div displays when Cordova is ready by JavaScript and contains:
- A Take Picture button: We create an event listener for this below to popup the Cordova Camera
- An empty img element: When the camera takes a picture, it uses this element to display the return image
If you run the app now, the GUI appears as follows:
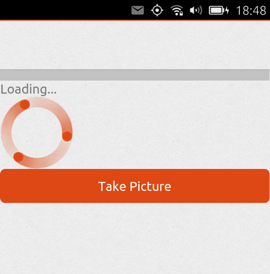
As noted above, that is the loading div that displays until Cordova deviceready event is received.
Tip: To isolate your application UI from future UI toolkit changes, we now recommend to bundle a copy of the toolkit inside your application package. There is a small tool documented here that will assist you in migrating your project. See https://code.launchpad.net/~dbarth/ubuntu-html5-theme/cmdline-tool/+merge/253498
Note: at the end of the index.html file you should also see a reference to a cordova.js script file which is loaded at the beginning of the page. This file is not present in the source 'www' directory. However it is automatically copied with the rest of the cordova runtime startup code, during the build phase. So don't worry, the file will be present in the resulting click package.
Let’s take the next step and add the JavaScript that responds to the Cordova deviceready event by hiding the loading div, displaying the loaded div, and providing an event handler for the Take Picture button.
Adding JavaScript to display the Cordova Camera
Here we add an event handler for the Cordova deviceready event and, inside that code, sets up our Take Picture to call the Cordova Camera API to let the user take a picture.
You should mostly replace the default www/js/index.js file with a new file
called app.js from the tutorial branch. We will look at the key elements of
this file below.
The first step is to init the UbuntuUI object to setup the main user interface parts. The following event listener will be triggered on the initial window load event, and prepare the rest of the UI
window.onload = function () { var UI = new UbuntuUI(); UI.init(); document.addEventListener("deviceready", function() { if (console && console.log) console.log('Platform layer API ready'); //hide the loading div and display the loaded div document.getElementById("loading").style.display = "none"; document.getElementById("loaded").style.display = "block";
Inside this function you can install a listener to react to the main button press, and capture the image with the camera. Here is how it looks:
// event listener to take picture UI.button("click").click( function() { navigator.camera.getPicture(onSuccess, onFail, { quality: 100, targetWidth: 400, targetHeight: 400, destinationType: Camera.DestinationType.DATA_URL, correctOrientation: true }); console.log("Take Picture button clicked"); }); // "click" button event handler }, false); // deviceready event handler }; // window.onload event handler
This is the first bit of new code that’s needed. Let’s take a look at it.
Examining the new event listener
- An event handler for the Cordova deviceready event is added. This is received when the Cordova system is fully loaded and ready, so this is a great place to put code that uses Cordova objects. (See Cordova Guide for information.)
- Inside the deviceready handler, first the loading div is hidden and then then loaded div is displayed.
- Then, the Take Picture button is obtained with: UI.button(“click”).
- Its click(FUNCTION) method provides the FUNCTION that runs when the button is clicked, the button’s event handler code. (See HTML5 APIs for complete API reference docs.)
- This event handling function calls the navigator.camera.getPicture(…) method.
- The navigator object is the base Cordova object and is available in the HTML5 runtime container when the app includes Cordova as described above.
- getPicture(…) takes three arguments: the name of the function to run when a picture is taken(this is calledonSuccess here and is defined below), the name of a function to run when an attempt to take a picture fails (onFail here, defined below), and some optional arguments.
- In the optional arguments, we set the image quality, its size, the type of image returned to DATA_URL, which enables passing the image directly in JavaScript as a base64 encoded piece of data (without saving it as a file), and enable orientation correction
Tip: The getPicture(…) method and its arguments are defined in the Cordova API reference docs.
Defining the onSuccess function
As we saw above, Cordova getPicture is told to run onSuccess when the picture is taken. Cordova runs it and passes it the actual picture, formatted as Cordova type DATA_URL.
So this app:
- Needs an onSuccess function
- That receives the passed image data
- And modifies the app’s HTML img element’s src attribute to actually display the image from the passed image data
Here is code that does these things. You can paste this into the bottom of app.js:
function onSuccess(imageData) { var image = document.getElementById('image'); image.src = "data:image/jpeg;base64," + imageData; image.style.margin = "10px"; image.style.display = "block"; }
Defining the onFailure function
For this simple app, we simply log the message provided by Cordova to console. Paste this at the bottom of app.js:
function onFail(message) { console.log("Picture failure: " + message);
Running the app
With these pieces in place, the app should run and allow you to take a picture.
As usual, do:
$ cordova run --device --debug
Here is how the application looks like after clicking Take Picture:
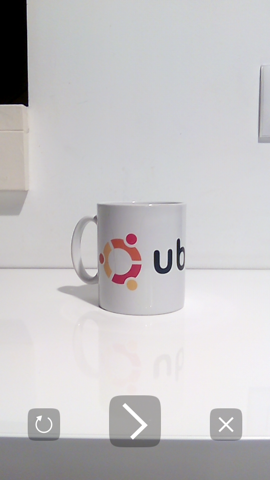
Once you validate the picture, the system will bring back your application and will display the photo below the button.
Polish
Add CSS
Let’s add some CSS styling:
- Make our Take Picture button Ubuntu orange
- Center it
- Center the “Loading…” progress spinner
Create www/app.css with this content:
#loading { position: absolute; left:45%; } #loaded { display: none; }
Now, in index.html, simply add the following inside the <head>
<link href="app.css" rel="stylesheet" type="text/css"/>
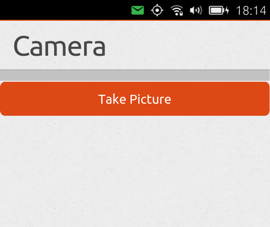
Now, the Loading page and the home page look like this:
Next steps
Check out the Cordova Guide for a high level review of using Cordova in Ubuntu HTML5 apps and for adding Ubuntu as a built platform for native Cordova projects.
The Cordova APIs give your HTML5 apps access to other system and device-level things, so check these out by visiting the Cordova API docs.