 Ubuntu Phone documentation
Tutorials - writing QML acceptance tests
In this tutorial you will learn how to write an autopilot test to strengthen the quality of your Ubuntu QML application. It builds upon the Currency Converter Tutorial.
Requirements
- Ubuntu 14.04 or later -- get Ubuntu.
- The Currency Converter tutorial -- if you haven't already, complete the Currency Converter tutorial.
- The lower level testing tutorials on unit testing, and integration testing.
Testing like a user with autopilot
Whew! Presuming we've written our QML application, and written some unit tests for it, we can now be assured our program works properly, and if we break it we'll know about it, right?
Well, from a logical level yes, we've now assured ourselves the program should behave reasonably. That is until a user gets ahold of it.
How can we make sure when they press a button or interact with our application that it will respond properly? What can we do to fill this final gap? The answer is a functional testing tool called Autopilot.
Preparing for launch
First things first, we'll need to make sure we install the autopilot tool. This can be done using the autopilot PPA. Add the PPA and install the packages.
sudo apt-add-repository ppa:autopilot/1.5 && sudo apt-get update && sudo apt-get install python3-autopilot python3-autopilot-vis
Let's also grab a branch of currency converter code from the tutorial with autopilot tests already written and in place to look at.
bzr branch lp:ubuntu-sdk-tutorials
This creates a new folder called ubuntu-sdk-tutorials. The code we'll be
looking at inside the branch is under getting-started/CurrencyConverter.
cd ubuntu-sdk-tutorials/getting-started/CurrencyConverter
Learning the basics of autopilot
A basic autopilot test consists of:
- a setup phase where we start the application and create any data we might need. Next,
- we interact with the application by pressing buttons, sending keystrokes and doing things a user would do. Finally,
- we make some assertions about our actions to ensure the application responded appropriately.
If you've used other testing frameworks that follow in the line of xUnit, you will notice the similarities.
So what does a test look like? If you notice there is already an autopilot folder waiting for us inside the tests subfolder of the "CurrencyConverter" subdirectory. Inside is a folder aptly called currencyconverter which represents our testsuite name. Finally, inside this folder is the testcases and supporting code.
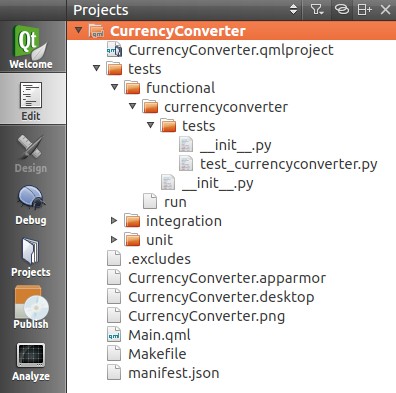
cd tests/functional/currencyconverter
So, let's take a look and talk about how it works.
Looking at the __init__.py file:
from autopilot.testcase import AutopilotTestCase
...
class CurrencyConverterTestCase(AutopilotTestCase):
...
    def setUp(self):
        super(CurrencyConverterTestCase, self).setUp()
        self.launcher, self.test_type = self.get_launcher_and_type()
        self.app = currencyconverter.CurrencyConverter(self.launcher(),
                                                       self.test_type)
And then the test_currencyconverter.py file:
from currencyconverter.tests import CurrencyConverterTestCase
class TestMainWindow(CurrencyConverterTestCase):
    def test_from_currency_convert(self):
        """ Setting from currency value should update to currency """
        self.app.main_view.set_random_from_value()
        to_value = self.app.main_view.get_to_currency_field().get_value()
        self.assertGreater(to_value, 0)
    def test_to_currency_convert(self):
        """ Setting to currency value should update from currency """
        self.app.main_view.set_random_to_value()
        from_value = self.app.main_view.get_from_currency_field().get_value()
        self.assertGreater(from_value, 0)
    def test_clear_button(self):
        """ Test if the clear button clears the screen """
        self.app.main_view.set_random_from_value()
        self.app.main_view.use_clear_button()
        self.assertEquals(self.app.main_view.get_from_currency_field().text,
                          '0.0')
        self.assertEquals(self.app.main_view.get_to_currency_field().text,
                          '0.0')
Back to __init__.py:
class CurrencyConverter(object):
    """Autopilot helper object for the currencyconverter application."""
    def __init__(self, app_proxy, test_type):
        self.app = app_proxy
        self.test_type = test_type
        self.main_view = self.app.select_single(Main)
    @property
    def pointing_device(self):
        return self.app.pointing_device
class Main(ubuntuuitoolkit.MainView):
    """Autopilot helper for the MainView."""
    def __init__(self, *args):
        super(Main, self).__init__(*args)
        self.visible.wait_for(True)
        self.wait_for_network()
We implement an AutopilotTestCase object (the CurrencyConverterTestCase class)
and define a new method for each test (e.g. test_clear_button).
You will also notice the setUp method inside __init__.py. This is called
before each test is run by the testrunner. In this case, our setup only
consists of launching the application before we run each test and waiting for
it to appear before continuing.
After setUp is launched a test_* function is executed. Finally the tearDown is run and the cycle continues with the next testcase.
Since we're testing our UI on multiple form factors, you'll notice we include
logic for a mouse or touch device in __init__.py. Autopilot supports running
against an agnostic display server (Xorg, mir, etc). We simply initialize our
"pointing_device", and we can issue touch/click and movement commands
generically. In this way our testcase can be the same across multiple form
factors.
The computer has eyes
To make things easier for us, we've also defined a class called Main inside of
__init__.py with several helper functions which you see utilized in the tests
inside of test_currencyconverter.py. In fact, this class builds upon an
entire suite of helpers made just for autopilot testing of Ubuntu SDK applications.
These helper functions are the basis of the vision we have inside the application. This is because autopilot hooks into the dbus session of our application to read the data behind the scenes. In this way we can then make assertions about an object's properties.
If you look closely you'll notice something else about the QML source file for
currency converter. To aid autopilot's vision, we've added objectName's to
the objects we wish to inspect at runtime. Using this objectName, we can issue
a select_single or select_multiple call to autopilot to grab this specific
object easily. Once we have the object, we can examine an object's data
structures to confirm application behavior at runtime by using asserts.
Button {
    id: clearBtn
    objectName: "clearBtn"
    text: i18n.tr("Clear")
    width: units.gu(12)
    onClicked: {
        inputTo.text = '0.0';
        inputFrom.text = '0.0';
    }
}
Testing the clear button
So, let's examine the testcase written to test the clear button for the application to see how this works.
- First we utilize our helper method to set a random value in the from field. This is done using the
select_singlemethod autopilot exposes to us. Given a named property type and object name, we can retrieve the object during runtime and examine it. - Next we utilize a second helper method, which relies on the autopilot functions to tap or click on the clearButton. You can see all of these helper methods inside the Main class in
__init__.py. - Lastly, we need to assert the resulting text fields are zeroed out -- just like we coded it.
from currencyconverter.tests import CurrencyConverterTestCase
class TestMainWindow(CurrencyConverterTestCase):
    def test_clear_button(self):
        """ Test if the clear button clears the screen """
        self.app.main_view.set_random_from_value()
        self.app.main_view.use_clear_button()
        self.assertEquals(self.app.main_view.get_from_currency_field().text,
                          '0.0')
        self.assertEquals(self.app.main_view.get_to_currency_field().text,
                          '0.0')
Computer, run my test!
We're now ready to execute the test to see what happens. Autopilot supports listing the testcases present in a testsuite and executing them via the autopilot list [testsuite] and autopilot3 run [testsuite] commands respectively. Autopilot also supports running in verbose mode via the '-v' argument. This helps us see the output as we execute the test. So from the tests/autopilot subfolder, execute:
autopilot3 run -v currencyconverter
This will execute the entire testsuite. It's important you execute this command from the tests/autopilot subfolder, else python will fail to find your testsuite. We can also run a single test at a time by specifying the testname in our run command. We can use the list command to see what's available, and then run just one test.
autopilot list currencyconverter
autopilot3 run -v currencyconverter.tests.test_currencyconverter.TestCurrencyConverter.test_clear_button
Seeing what autopilot sees
Autopilot contains an additional tool that let's us see the entire dbus session that autopilot has available; including things we might not realize are defined by our application. This can be useful for adding more advanced testcases or to debug your existing tests further. This happens via the autopilot launch and autopilot vis commands. The launch command prepares and launches the application with a hook for autopilot to introspect it's data. The vis command then launches a visualizer allowing us to examine the data autopilot gathers.
autopilot launch -i Qt qmlscene /path/to/file.qml
autopilot3 vis
Select the QtQmlViewer Connection from the dropdown and presto, say hello to
the entire dbus session properties and values for our application.
Conclusion
You've just learned how to test a form-factor-independent Ubuntu application for the phone. But there is more information to be learned about the powers of autopilot. Check out the links below for more documentation and help. Welcome to the world of testing!